
Last updated November 16, 2026
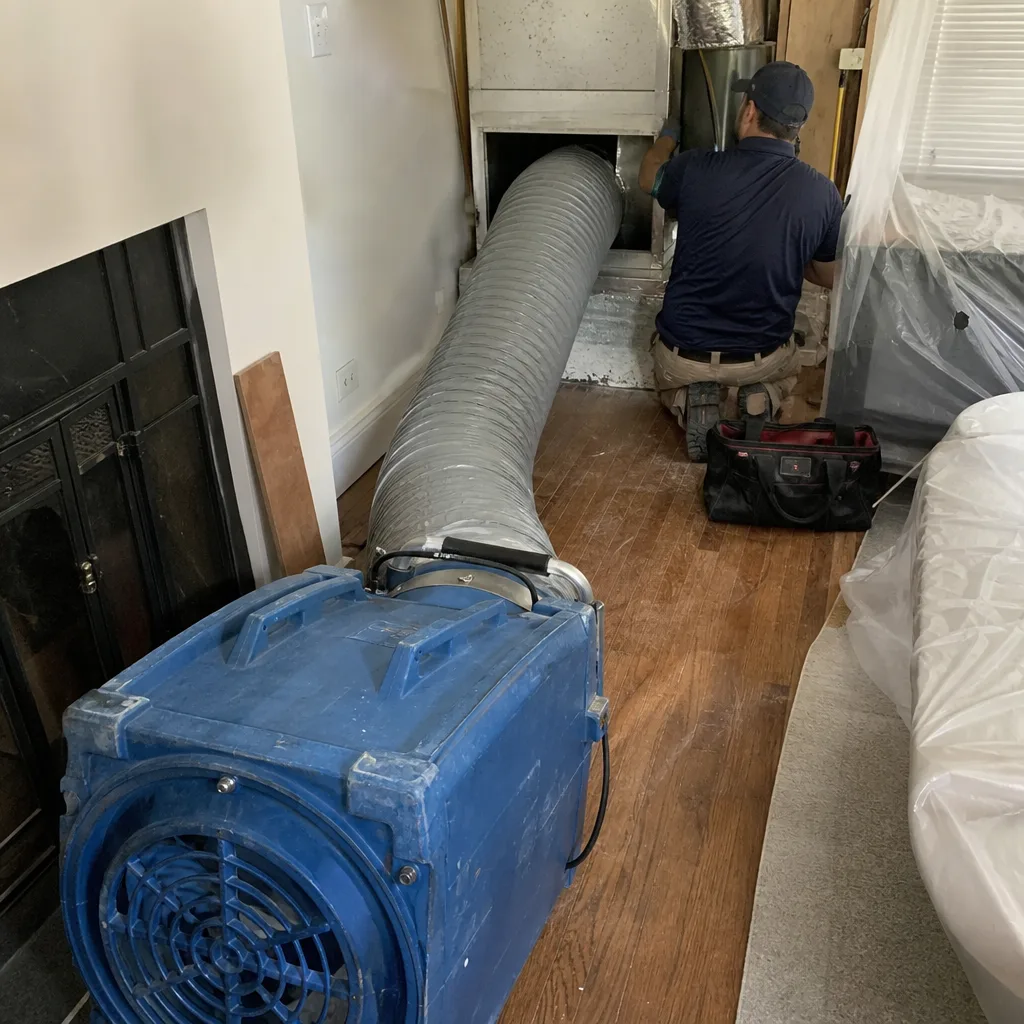
 Whole-home duct cleaning
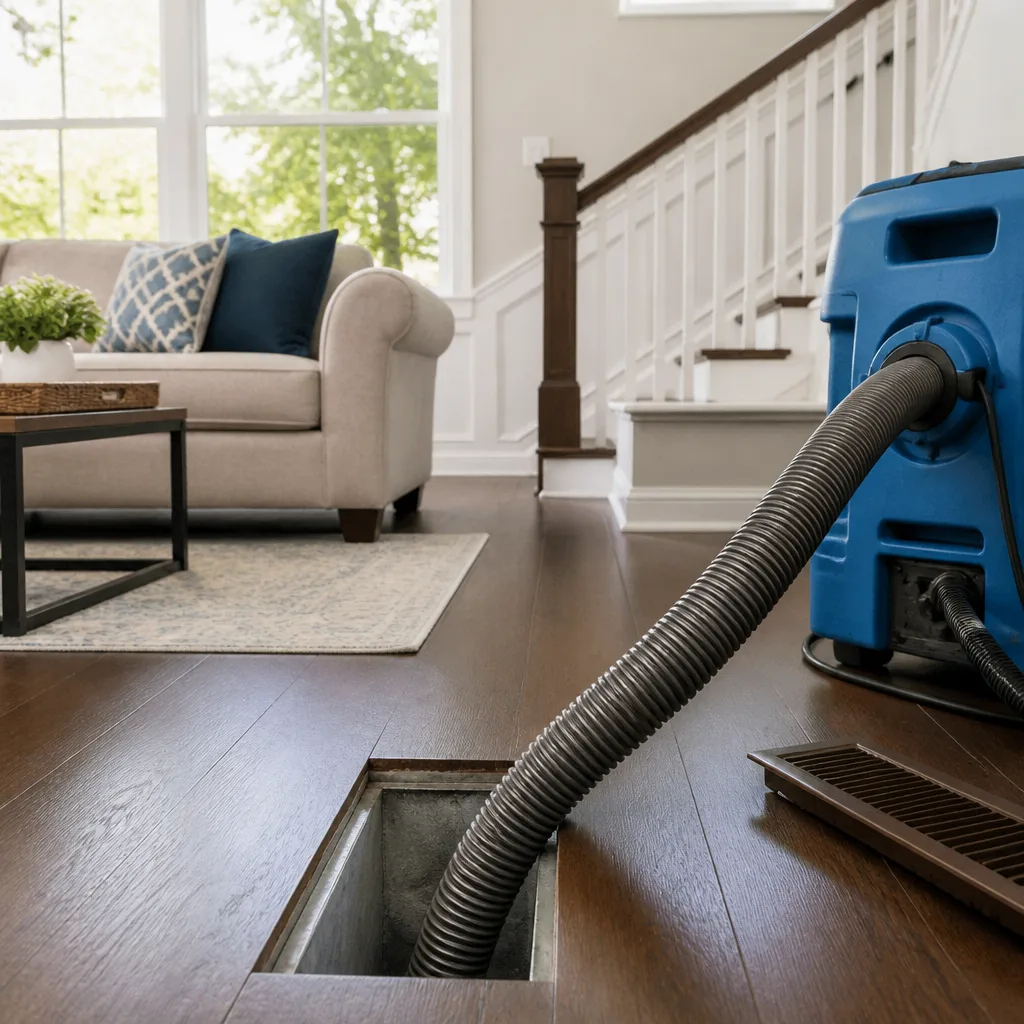
 Dryer vent cleaning
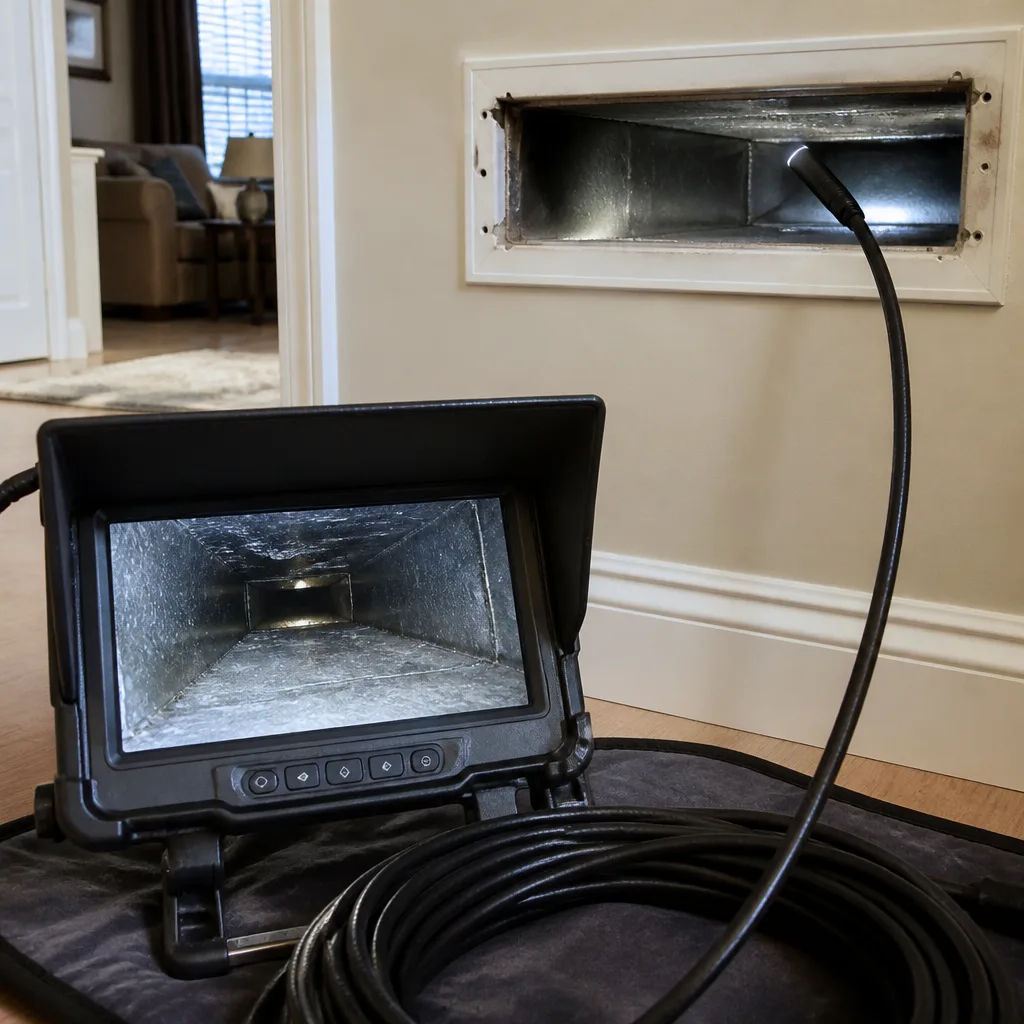 Camera inspection
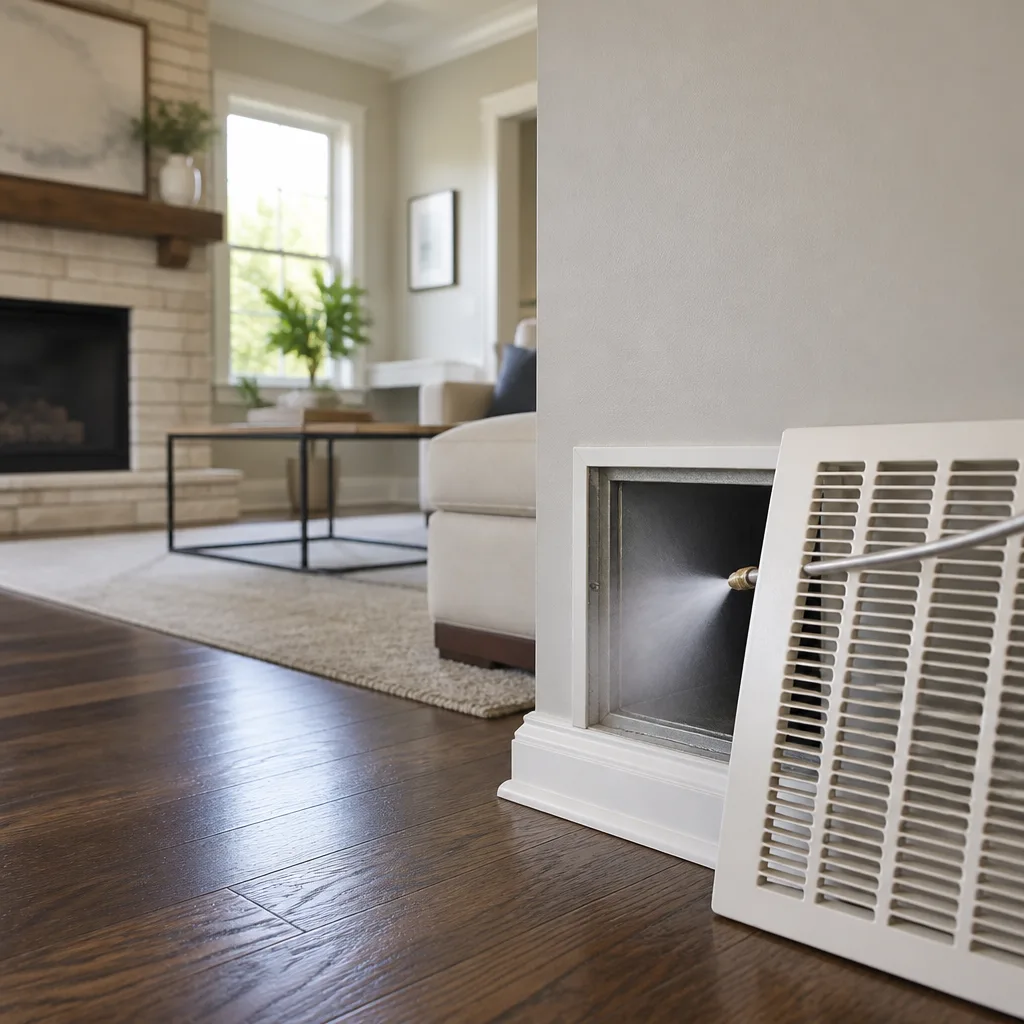 Sanitizing & deodorizing
Whole-system duct and dryer vent check with before-and-after photos - you see exactly what came out of your vents
That "$99 whole-house special" is a bait ad - the real number appears once they are in your hallway, or the "clean" is a shop-vac at the register. We photograph the inside of your ducts before and after instead.
Air Duct Repair Maintenance Checklist for Providence Homeowners
Most homeowners treat ductwork like plumbing: out of sight, so out of mind until something fails. That’s backward, and it’s why a cleaning visit can feel like a wasted afternoon within a year. Cleaning a leaking duct system is like mopping a floor beneath a dripping ceiling. The structural problems simply undo the work. In our experience across Providence, the biggest air quality complaints trace back to gaps, tears and crushed runs, not dirt alone. This guide walks through a room-by-room inspection keyed to the city’s housing stock, shows how to tell a cleaning problem from a repair problem, and explains when mastic sealant is the right fix versus when sheet metal has to be replaced.
Quick Answer
Air duct maintenance in Providence should be inspection-first: check for separated flex-duct joints, deteriorated duct-board seams and crushed runs before scheduling any cleaning. Repair those failures first, then clean. Most homes need a visual inspection once a year, timed before heating season and before cooling season, with a full professional cleaning and repair assessment every few years depending on the system.
Styles & brands we work with
- Whole-home duct cleaning
- Dryer vent cleaning
- Camera inspection
- Sanitizing & deodorizing
Table of Contents
- Why Inspection Comes Before Cleaning
- Providence Housing Types and Their Duct Vulnerability Zones
- Cleaning Problem or Repair Problem? How to Tell
- Specific Failure Modes to Check
- Mastic Sealant vs. Sheet-Metal Replacement
- Seasonal Maintenance Timing for Providence’s Climate
- Room-by-Room Inspection Checklist
- When to Call a Professional
- Frequently Asked Questions
Why Inspection Comes Before Cleaning
A U.S. Department of Energy study found that the average forced-air system loses 20 – 30% of its conditioned air through duct leaks. In Providence’s older balloon-frame homes, that figure can climb. Ducts often run through uninsulated attic kneewall spaces that see full seasonal temperature swings, and a leak there dumps heated or cooled air into a cavity nobody’s living in. You pay for comfort you never feel.
This is the core argument for reframing duct maintenance as an inspection-first discipline. A technician who arrives with cleaning equipment alone will remove dust and leave the leaks. Six months later the homeowner is calling again, convinced cleaning doesn’t work. It did work. The system is just breathing through a hole.
Here’s what an inspection-first approach actually looks like:
- Open a few supply registers and look inside with a light before any equipment runs.
- Trace flex-duct runs through the basement, attic or crawlspace to where they connect at the trunk.
- Check plenum connections and seam condition at the air handler cabinet.
- Document every gap, tear, crushed section or disconnected joint.
- Decide what gets sealed, what gets replaced, and what just needs cleaning.
Only after that sequence does cleaning make sense. We use professional equipment because cleaning a system properly takes more than a shop vac: Rotobrush contact-cleaning systems and Nikro negative-pressure machines do the work consumer tools can’t. But equipment is the second decision. Diagnosis is the first.
For a fuller picture of how air duct cleaning fits into this, it helps to understand that cleaning and repair are two parts of one job.
Providence Housing Types and Their Duct Vulnerability Zones
Providence isn’t one housing market. A triple-decker on the East Side, a colonial ranch out toward the reservoir neighborhoods, and a converted mill condo near the river each fail in different places. Knowing which building type you live in tells you where to look first.
Triple-Deckers
These stacked three-family buildings often have retrofit ductwork that was added long after construction. Runs get snaked through closets, over ceilings and down walls. Common failure points:
- Flex-duct crushing where it bends sharply around framing.
- Joint separation at collar connections where a branch ties into the trunk.
- Ducts routed through unheated basement ceiling space with no insulation wrap.
Because the units share a structure, a leak serving one floor can pull air from a cavity serving another. That’s one reason indoor air quality complaints in triple-deckers can be hard to pin down.
Colonial Ranches
Ranch layouts tend to have long trunk lines running the full length of the house, with branches feeding each room. The trunk in the attic or crawlspace is the place to inspect first. Weather extremes and seasonal movement open seams over time. Flex-duct collar connections at the trunk are the most common place we find separated joints in this housing type.
Converted Mill Condos
Mill conversions have character and complicated duct paths. Ducts get threaded through original timber framing, and individual units may have entirely different duct systems from their neighbors. Failure modes worth checking:
- Compromised duct-board sections in shared or semi-conditioned basement cavities.
- Runs crushed behind finished walls during renovation.
- Disconnected flex-duct in attic sections converted to living space.
For mill condos, the inspection often requires opening a few access points. A technician should explain what’s being opened and why before cutting anything.
If you’re uncertain what kind of system you’re working with, a technician can walk you through it. Our technicians have up to 13 years of experience with this range of Providence housing.
Cleaning Problem or Repair Problem? How to Tell
This distinction saves money and it prevents repeat service calls. Most homeowners schedule cleaning when the real issue is repair, then feel like the first visit failed when the dust returns. The symptoms overlap enough to cause confusion, so let’s separate them clearly.
Signs You Likely Have a Cleaning Problem
- Dust on supply registers or around return grilles returning quickly after cleaning.
- Noticeable odors when the system runs, especially mustiness in the summer.
- Visible dust buildup inside supply registers when you open them.
- A recent renovation that produced construction dust entering the system.
- No obvious gaps, tears or disconnected joints during visual inspection.
Signs You Likely Have a Repair Problem
- Some rooms never reach temperature no matter how long the system runs.
- Dusty air in one specific room rather than the whole house.
- Whistling or rushing sounds at registers, sometimes from registers you’ve closed thinking they were the problem.
- Higher-than-expected heating or cooling costs without an obvious cause.
- Visible tears at flex-duct joints, crushed sections or disconnected fittings.
One condition often hides the other. A system with serious leaks pulls air from cavities, then that dust lands inside the ducts. Clean it and you’ve still got the leak. Seal the leak and you still want the ducts cleaned because they’ve been pulling unfiltered air. In our experience, most Providence homes with active complaints need both, and the repair should come first.
Before you schedule any service, do a two-minute check yourself. Open three registers. Look in with a flashlight. Note what you see. That single step lets a technician skip the discovery conversation and get straight to the right diagnosis.
Specific Failure Modes to Check
These three failure modes account for a large share of the repair calls we see in Providence. Each has a specific tell, and checking for them doesn’t require special tools.
1. Separated Flex-Duct Joints at Collar Connections
Flex duct attaches to the trunk using a collar and inner liner. Over time, the inner liner tears, the tape ages, and the joint opens. You may see a gap where the flex duct meets the metal collar, or notice a ring of dusty residue where air has been escaping.
This is one of the most common repair items. Left alone, it dumps conditioned air into the attic or basement and pulls unfiltered air into the return path.
2. Deteriorated Duct-Board Seams in Humid Basements
Duct board is a rigid product that can lose integrity when exposed to humidity. In a Providence basement that stays damp through the summer, duct-board seams can soften, separate, or degrade at corners. Look for crumbling edges, dark staining, or gaps at angled joints. This is a humidity issue more than an age issue, and it’s why basement ducts benefit from inspection before cooling season.
3. Crushed Runs in Finished Attic Conversions
When an attic gets converted to living space, ducts sometimes get re-routed around new framing. A run that gets squeezed down to half its designed cross-section stops delivering air where it’s needed. Signs include rooms that never warm properly, and physical evidence of crushed flex duct when you look through an attic access panel.
Secondary Failure Modes Worth Checking
- Ducts sagging between supports, which reduces airflow.
- Insulation wrap falling off basement or attic runs.
- Return-air paths blocked behind furniture or drywall patches.
- Air-handler cabinet seams that have opened, letting return air escape before the filter.
Every one of these failure modes is fixed by repair, not cleaning. That’s why we treat air duct repair as a service on its own rather than an add-on to a cleaning visit.
Mastic Sealant vs. Sheet-Metal Replacement
This is the decision most homeowners want to skip, because it sounds technical. It doesn’t have to be. The rule of thumb: seal with mastic when the duct is structurally sound and the gap is at a joint. Replace with sheet metal when the duct itself is crushed, collapsed, or too badly deteriorated to seal.
When Mastic Sealant Is the Right Fix
- Gaps at joints where flex duct attaches to a metal collar and the liner is intact.
- Open seams along a metal trunk where the duct is still rigid and straight.
- Small cracks at plenum connections where the cabinet is intact.
- Basement duct-board seams that have separated but the board is still solid.
Mastic is preferred over tape because tape loses adhesion over time, especially in a cavity that swings between warm and cold, which is exactly what an attic kneewall does through a Providence winter.
When Sheet-Metal Replacement Is Necessary
- Crushed flex duct that can’t be re-rounded without damage.
- Runs that have been compressed to less than their design cross-section by framing changes.
- Duct-board sections that have crumbled or gone soft from long-term dampness.
- Rusted or corroded metal trunk sections.
There’s also a middle option: replace a short damaged section of flex duct with new insulated flex, while sealing the surrounding joints with mastic. That’s the right call more often than a homeowner expects, and it keeps costs proportionate.
How to Tell from the Supply Register Opening
Open a supply register and shine a flashlight inside. What you see tells you a lot:
- Rounded, continuous duct with a clean interior and no visible gap: likely fine, cleaning issue at most.
- Visible seam with a small gap, duct still rigid: mastic sealant candidate.
- Duct visibly crushed, folded flat, or pinched: replacement candidate at that run.
- Duct interior coated in dust, with no obvious structural issue: cleaning candidate.
This is a general guide, not a diagnosis. A technician can confirm what you’ve found with a proper look at the joint from the trunk side.
Seasonal Maintenance Timing for Providence’s Climate
Providence has a real winter and a real summer, and ductwork in this climate sees significant temperature swings. That makes timing matter. The short answer: inspect before heating season and before cooling season, because those are the two points when the system goes from resting to running hard.
Before Heating Season
Early fall is the right time to inspect ducts, especially any run in an attic or unheated basement. Things to check:
- Flex-duct joints at collars for separated connections that opened over the summer.
- Insulation wrap on basement runs (a winter without it wastes a lot of heated air).
- Return-air paths still clear after summer furniture changes.
- Any smell you noticed over the summer that disappeared once cooling stopped. It’ll come back when heat runs.
Repair before heating season means the first cold snap doesn’t reveal a problem you could have fixed in October.
Before Cooling Season
Late spring is the other inspection point. Warmer, more humid weather matters for duct-board integrity and for mold growth (which we don’t treat, but we do inspect for signs that ducts are staying wet). Things to check:
- Basement duct-board seams for softening, given humidity levels that build through spring.
- Condensate-related moisture near the air handler that could be affecting nearby ductwork.
- Filters before the system runs hard, since a dirty filter increases pull on every joint.
Between those two windows, a visual walkthrough takes about ten minutes and catches most developing problems.
A Note on Frequency
Professional cleaning and inspection frequency depends on the system, the household and whether there’s been a renovation or a pet change. Mildew-smelling ducts or visible dust returning quickly after cleaning are signs to schedule an inspection sooner. For most households, an annual visual check plus professional cleaning every few years is a reasonable baseline, adjusted downward after any major renovation.
Room-by-Room Inspection Checklist
This is the practical part. Walk through the house in this order and note what you find. Ten minutes and a flashlight will get you through it.
Living Room and Bedrooms
- Remove each supply register cover and look inside. Note obvious dust, debris, or visible structural issues.
- Check airflow at each register with your hand. Note any register that feels weak compared to others. A single weak register points to a specific duct problem.
- Look up at ceiling registers for dusty streaks on the paint or drywall around the frame. Those indicate air escaping around the register.
- Note any room that feels noticeably colder or warmer than the rest of the house.
Bathrooms and Kitchen
Bathroom exhaust and kitchen range hoods are separate from the HVAC duct system, but they’re worth checking. Bath fans that exhaust into the attic rather than outside add moisture to the space above the ceiling, which can affect ducts running through it. Look at the exit point on the exterior wall or roof to confirm the exhaust is going outside.
Basement or Crawlspace
- Walk the visible duct runs from the air handler to the outer walls.
- Check each flex-duct-to-collar connection for separation.
- Look at duct-board seams for soft, crumbling or separated edges.
- Check insulation wrap on runs that pass through unheated space.
- Note any area where ducts have sagged away from their supports.
Attic
- Inspect runs passing through attic kneewall spaces, which see the widest temperature swings in the house.
- Look for crushed duct where newer framing intersects older runs.
- Check that returns aren’t pulling air from the attic cavity itself.
- Note any attic runs with missing insulation wrap.
Air Handler Cabinet
- Inspect seams at the cabinet for gaps where return air escapes before the filter.
- Check the filter condition. A clogged filter pulls harder on every joint in the system.
- Look at the plenum connection where the trunk line leaves the cabinet. This is a common leak point.
Laundry Area
While you’re checking the HVAC system, look at the dryer vent. A clogged dryer vent is a fire hazard, not a maintenance nuisance. Check the outdoor vent flap to confirm it opens easily and no lint is visible at the exit. Dryer vent cleaning is a straightforward service and one most pure duct-cleaning companies don’t offer. For more on dryer vent cleaning, it’s worth understanding why this is a safety issue rather than a cleaning upgrade.
See the difference
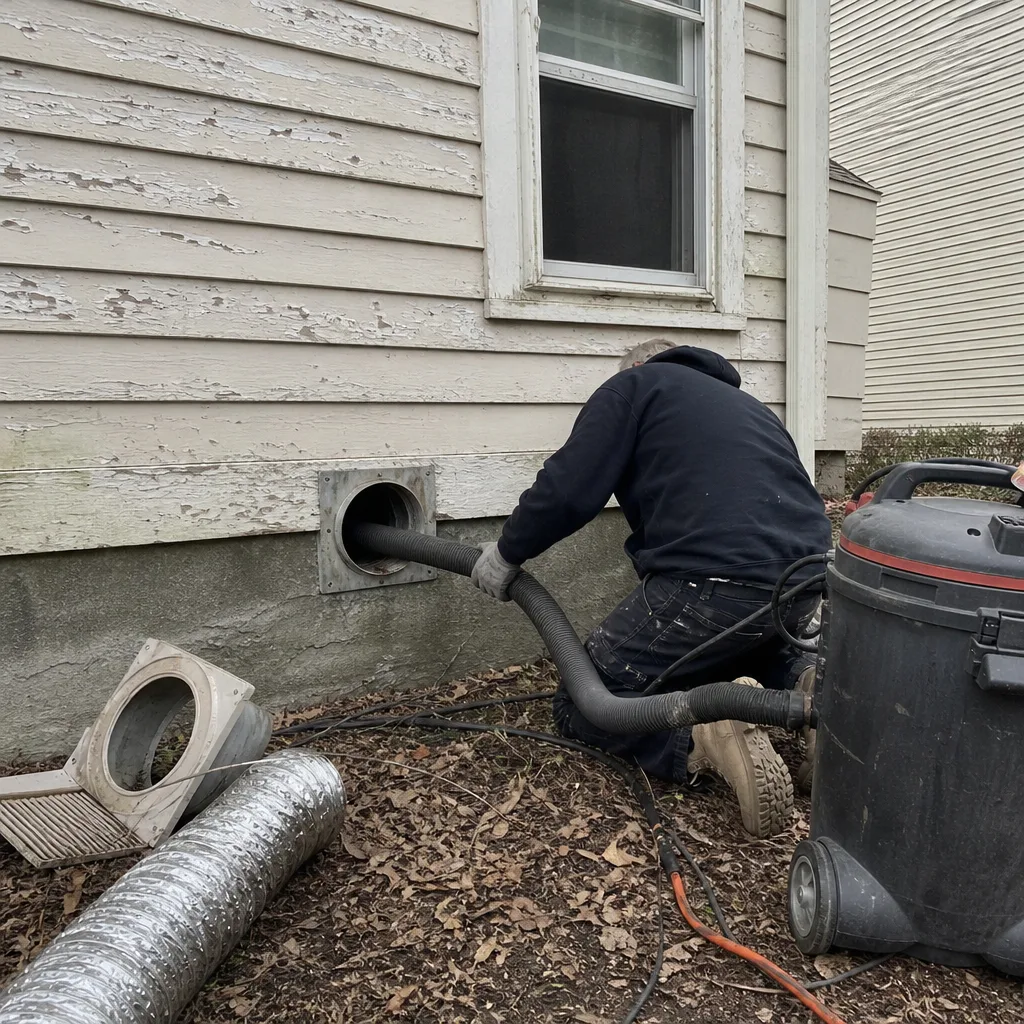 Before
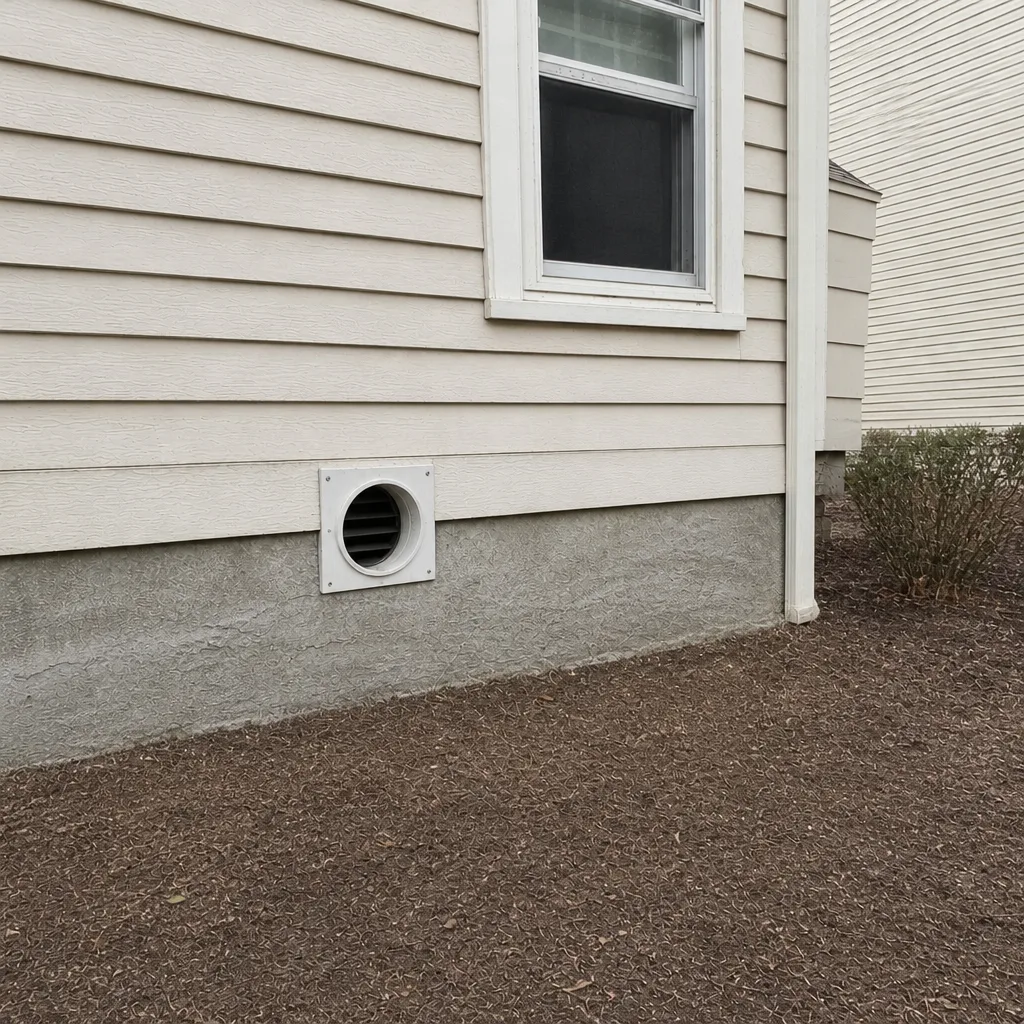 After
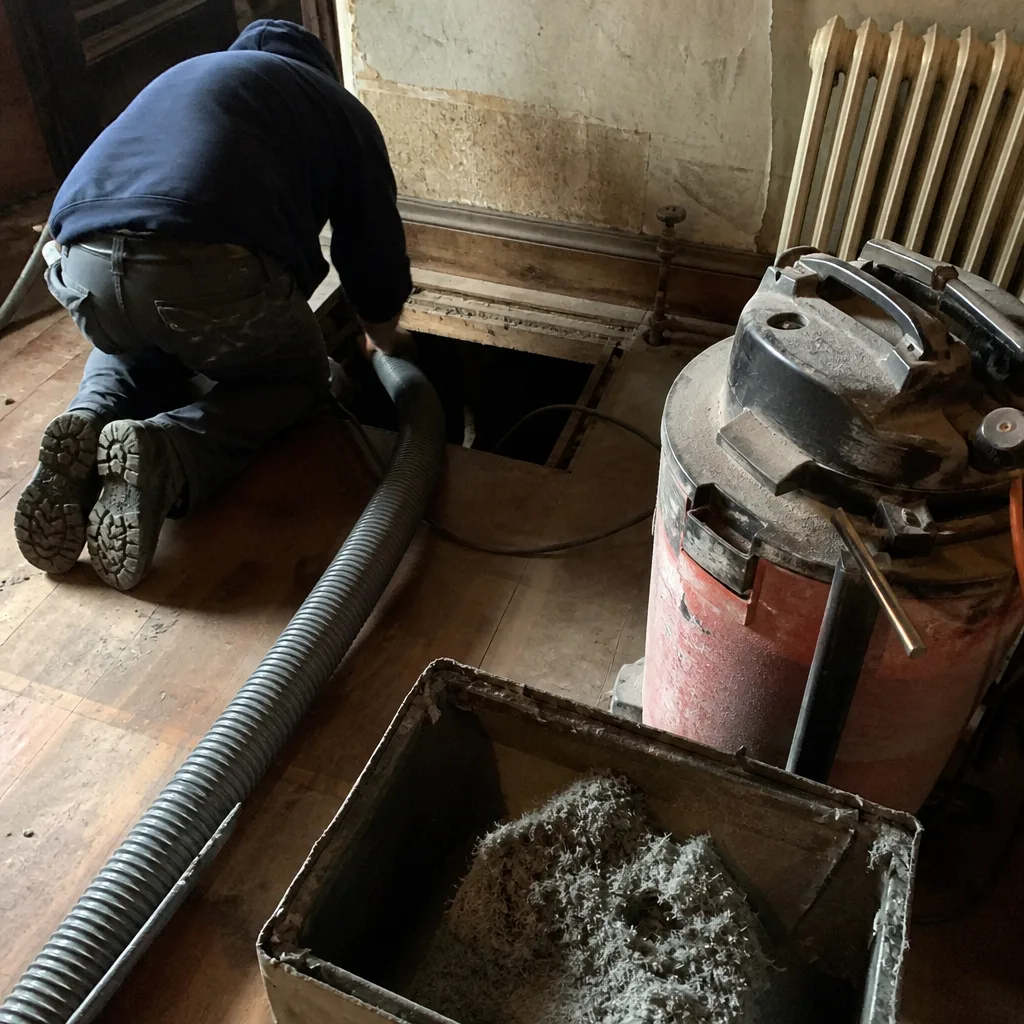 Before
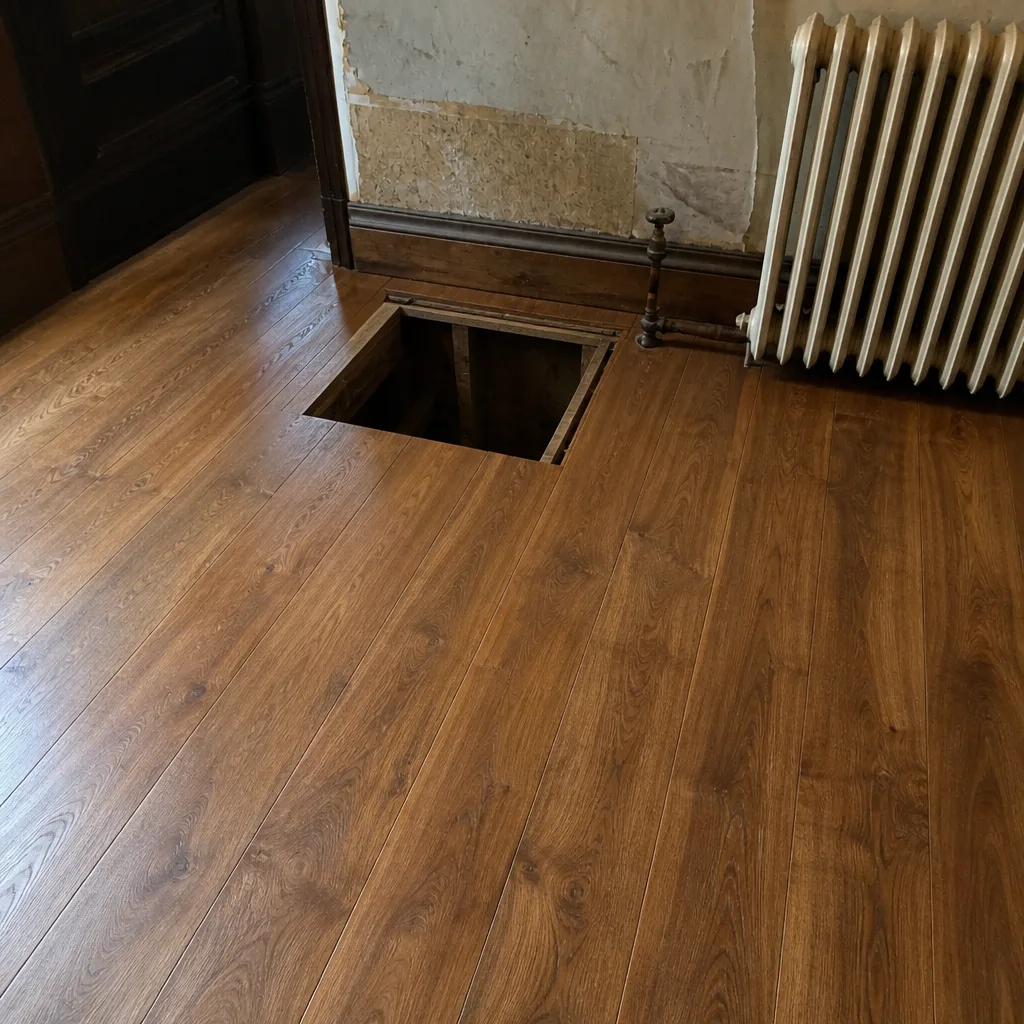 After
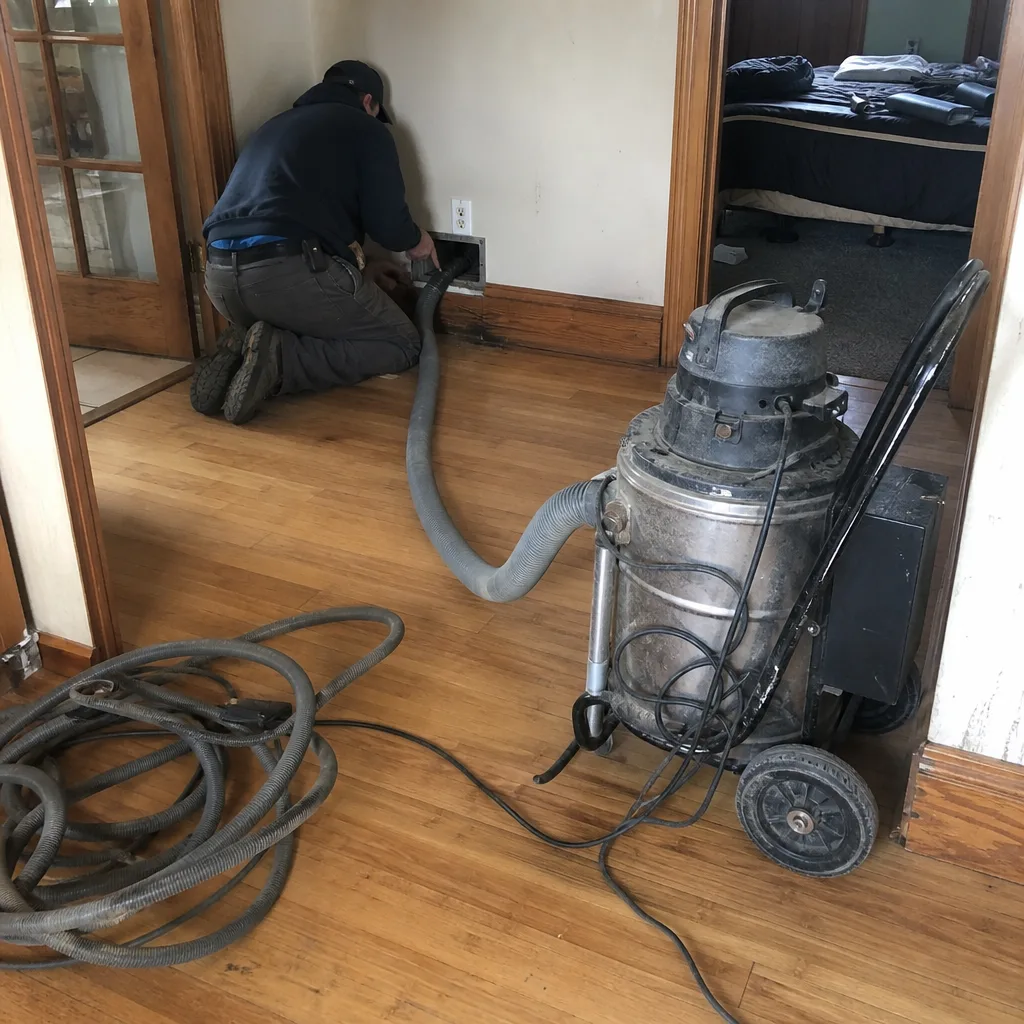 Before
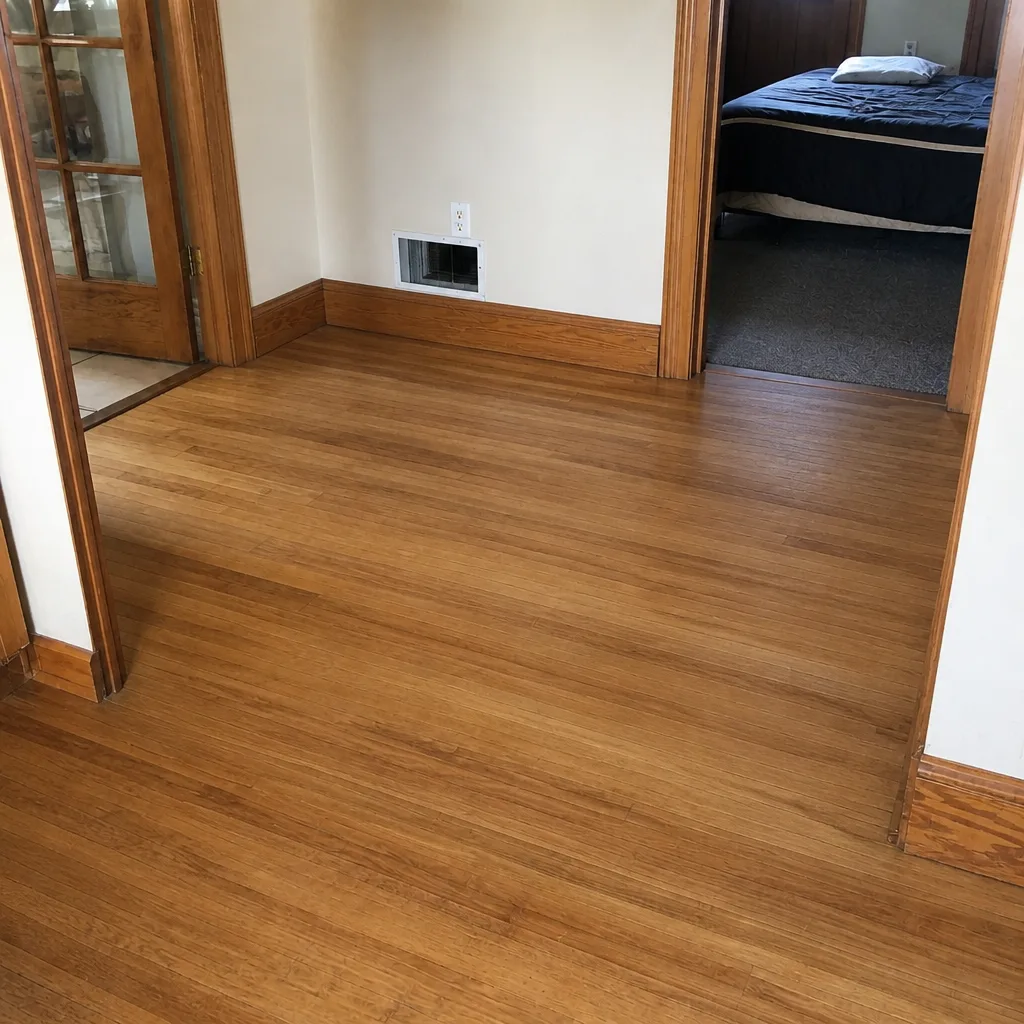 After
Common Mistakes to Avoid
- Scheduling cleaning before repair. Cleaning a leaking system means the dust returns in months. Diagnose first, repair second, clean third.
- Using duct tape as a permanent fix. Duct tape loses adhesion in fluctuating temperatures, especially in attic and basement cavities. Mastic sealant is the right product for sealing joints.
- Assuming one dusty room means the whole system needs cleaning. A single dusty room is usually a sign of a specific leak or crushed run to that room, not a general cleaning issue.
- Ignoring the air handler cabinet. Many leaks happen at the cabinet, before air even reaches the ducts. Check seams at the cabinet, not just at registers.
- Forgetting the dryer vent in a duct maintenance plan. It’s a safety concern and a straightforward inspection item. It shouldn’t wait until something goes wrong.
- Choosing the cheapest quote without knowing what’s included. A cleaning quote that doesn’t include inspection and repair won’t address the leaks that undo the work.
- Skipping pre-season inspection because the system “still works.” Most duct problems show up as cost and comfort complaints, not equipment failures, so a functioning system can still have significant leaks.
When to Call a Professional
Call for professional service when you find a disconnected or crushed duct, when you see deteriorating duct-board seams in a basement, when a specific room never reaches temperature no matter what you do, or when you want a full inspection across a house you’ve just purchased. Also call if you’ve had a recent renovation and construction dust made it into the system, or if you notice persistent mustiness when the system runs. These are repair and cleaning decisions that benefit from professional equipment: Nikro negative-pressure machines for dust control, Abatement Technologies HEPA containment where allergy concerns are present, and mastic sealing at every joint we open. In homes where filtration matters long-term, we also work with Honeywell and Aprilaire products so the ducts stay clean longer after the repair. Duct Cleaning Providence offers free estimates in Providence. Call (844) 542-8739.
Frequently Asked Questions
Once a year is a reasonable baseline for most Providence homes, with a full professional cleaning and repair assessment every few years depending on the system and household. Inspect before heating season (early fall) and before cooling season (late spring). Homes with pets, allergy concerns or recent renovation should inspect more often.
Cleaning removes dust and debris from inside the ducts. Repair fixes structural problems: separated joints, crushed runs, deteriorated duct-board seams and opened air-handler cabinet seams. Cleaning a system with active structural problems is temporary because leaks pull unfiltered air back in. Most homes with active complaints need both, and repair should come first.
Sealing accessible ducts in a basement with mastic sealant is possible for a careful homeowner, but anything inside an attic, behind drywall, or at the air handler cabinet is best left to a professional. Frozen joints at flex duct collars and crushed runs need proper inspection to diagnose. If you’re unsure what you’re looking at, have a technician walk you through it.
In most cases it’s a crushed or disconnected duct run to that specific room, not a furnace problem. Triple-deckers and converted mill condos are especially prone to this because ducts get snaked around framing and can be compressed in the process. Checking the supply register opening for the affected room is the fastest way to start.
Yes. A clogged dryer vent is a documented fire hazard, not just a maintenance item, and it’s a service most pure duct-cleaning companies ignore. Add it to the same yearly walk-through. Check the outdoor vent flap for lint buildup and make sure it opens freely.
Look for a professional with equipment that can handle real repair, not just cleaning: Rotobrush contact-cleaning systems, Nikro negative-pressure equipment and HEPA containment capability. Ask whether they can repair ducts, not just clean them, and whether their quote includes inspection. If the answer is cleaning-only, ask what happens when they find a broken joint. Call (844) 542-8739 for a free estimate and we’ll walk you through what your system needs.
The Bottom Line
Duct maintenance in Providence is a repair-first discipline. Inspect for separated flex-duct joints, deteriorating duct-board seams and crushed runs before scheduling any cleaning. Know which housing type you’re in: triple-deckers, colonial ranches and converted mill condos each fail in their own places. Time your inspections before heating season and before cooling season. Mastic sealant is the right fix for joints; sheet-metal replacement is the right fix for crushed or deteriorated ducts. And don’t forget the dryer vent, which belongs on the same checklist. Fix what’s broken, then clean. In that order, cleaning holds, and the air stays clean.
Written by the team at Duct Cleaning Providence.
Contact
If you’ve worked through this checklist and found a gap, a crushed run or a duct-board seam that’s starting to go, or if you’d rather have a technician walk the house with you, we can help. Call (844) 542-8739 for a free estimate. We answer 24/7. Fast dispatch from 7am to 7pm, Sunday through Friday. We clean it, we repair it, we improve it, and we’ll show you exactly what we find before any work begins.